Mux Serverless Webhook Updates using Telegram Bots

I build accessible, fast and secure sites, currently focussing on frontend using JAMStack. My consultancy spans the gamut of developing SEO-friendly sites from scratch to developer advocacy for a range of technologies. If I like it I can write and talk about it! I enthusiastically generate blog and video content from how-tos helpful to anyone finding their feet with the technology to more in-depth case studies helping developers generate c-suite interest in projects. Get in touch to find out more.
📼 Mux Video Upload
In this post on Mux serverless webhook updates we see how you can use serverless functions in your Mux video workflow. Mux is a video service which takes care of encoding your video content and serving it in the best format for each user’s device. Mux is primarily designed for developers. As an example, to upload video, you use the REST API, either using something like curl, from the Terminal or you own custom app. Some tasks which Mux performs, like video encoding, for example, are not immediate. You might want to know once Mux have finished encoding your video so you can integrate content into your project immediately. Pinging the Mux endpoint until it reports the video is ready is not ideal. Instead Mux makes webhooks available.
🧱 Mux Serverless Webhook Updates: What we’re Building
With the webhooks, Mux will send a new request to your own URL as soon as they have an update. That request is just a REST POST with a JSON body. Your webhook URL will be one you manage, rather than one provided by Mux. If you are using the Terminal to upload videos or a static site, you can set up a serverless function to listen for the Mux webhook. In fact, that’s exactly what we will look at in this post. We will use Rust Cloudflare Workers to listen for Mux requests. Whenever the worker receives a request, it will invoke the Telegram API. A Telegram bot will then send the update to your own private chat.
Using Telegram lets you and your team get updates even while away from the desk (via the mobile app). To add polish, we see how to verify webhook events using your Mux signing key. All within the worker.
If that sounds like something you could find useful why don’t we crack on? To get going you will need a Cloudflare account as well as a Mux account. We will start with a quick look at what Cloudflare workers are then, we move on to Telegram bot configuration. Finally we code up the Rust.
☁️ Rust Cloudflare Workers
Rust Cloudflare workers are a great way to handle webhook events. They will listen 24/7 and save you having to maintain infrastructure. We will create the Cloudflare worker step by step. To build the workers we will use the wrangler CLI. If it is your first time using wrangler, just follow the few configuration steps in the article on getting started with Rust Cloudflare workers. That article will also let you know how to set your system up for developing Rust.
⚙️ Rust Cloudflare Worker Initialisation
To get going let’s spin up a new skeleton worker:
wrangler generate --type=rust mux-serverless-webhook-updates
cd mux-serverless-webhook-updates
Next we will update the Cargo.toml project file and add the crates (Rust packages) we need for our worker.
[package]
name = "mux-serverless-webhook-updates"
version = "0.1.0"
authors = ["Rodney Lab <codesign@rodneylab.com>"]
edition = "2018"
description = "Mux serverless webhook: how you can use Rust Cloudflare Workers to listen for Mux status updates, authenticate and ping you Telegram alerts."
repository = "https://github.com/example/mux-serverless-webhook-updates"
license = "BSD-3-Clause"

[lib]
crate-type = ["cdylib", "rlib"]

[features]
default = ["console_error_panic_hook"]

[dependencies]
cfg-if = "0.1.2"
hex="0.4.3"
hmac="0.12.0"
nom = "7.1.0"
reqwest = { version = "0.11.10", features = ["json"]}
serde = "1.0.136"
sha2 = "0.10"
worker = "0.0.9"
serde_json = "1.0.67"

# TRUNCATED...
We will use the reqwest package to access the Telegram REST API. hex and hmac will help us verify the Mux webhook signature. Finally, nom is a parser combinator. You use parser combinators, to parse strings. They take a different approach to Regex, but solve similar problems. They are more composable and can be much more efficient. Change the package data to suit your own needs. Lines 6–9 are optional though you may wish to update and include them to follow best practices.
As a quick test, from within the project folder, in the Terminal, spin up the worker locally in dev mode:
wrangler dev
It will take a moment or two to download crates and build the skeleton worker the first time we run this. If all is well you will have a message saying the wasm package is ready and the worker is listening on http://127.0.0.1:8787.
![Mux Serverless Webhook Updates: wrangler dev output: Terminal Screenshot reads: Compiling thiserror v1.0.30 Compiling pin-project v1.0.10 Compiling futures-executor v0.3.17 Compiling futures v0.3.17 Compiling serde_urlencoded v0.7.1 Compiling js-sys v0.3.55 Compiling console_error_panic_hook v0.1.6 Compiling wasm-bindgen-futures v0.4.28 Compiling web-sys v0.3.55 Compiling chrono v0.4.19 Compiling worker-kv v0.5.1 Compiling worker-sys v0.0.4 Compiling reqwest v0.11.10 Compiling worker-macros v0.0.4 Compiling worker v0.0.9 Compiling mux-serverless-webhook-updates v0.1.0 (mux-serverless-webhook-updates) Finished release [optimized] target(s) in 1m 01s [INFO]: ⬇️ Installing wasm-bindgen... [INFO]: Optimizing wasm binaries with `wasm-opt`... [INFO]: ✨ Done in 1m 02s [INFO]: 📦 Your wasm pkg is ready to publish at mux-serverless-webhook-updates/build. 👂 Listening on http://127.0.0.1:8787](https://dev-to-uploads.s3.amazonaws.com/uploads/articles/7fanuw0lknsgq0ccr7o0.png)
Now we have a skeleton Worker up and running, let's get some Telegram credentials.
🎬 Mux Setup
You will need to let Mux know the Cloudflare Worker endpoint. To authenticate messages, we will also need a signing key from the Mux dashboard. We’ll sort these out now. If you are not already logged in, log in now to the Mux Dashboard.
Next, from the menu at the bottom left, select Settings then Webhooks.
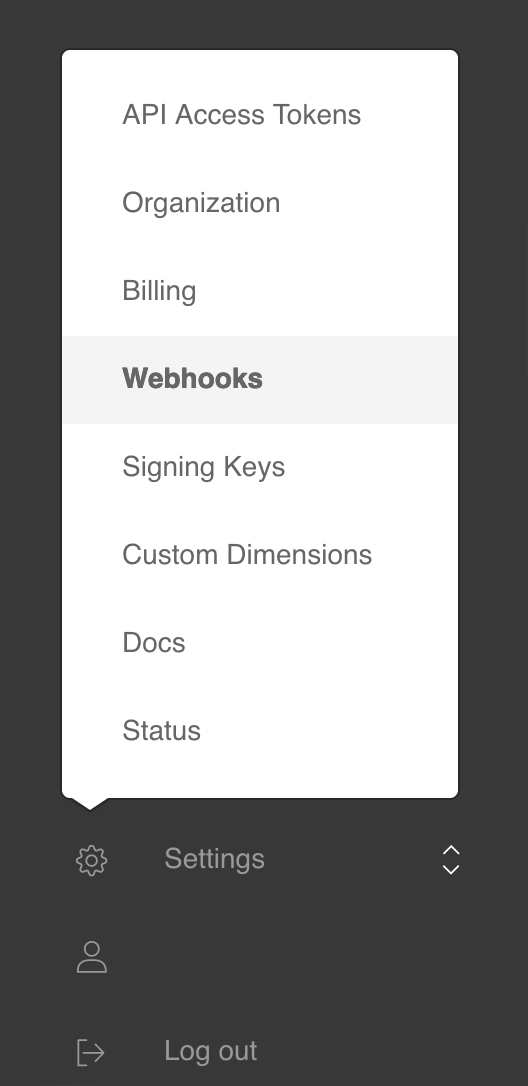
In the main window you will see all of your webhooks. By default the dashboard displays the Development environment webhooks. If this is your first webhook you’ll see a message saying “You haven’t created any webhooks yet”.
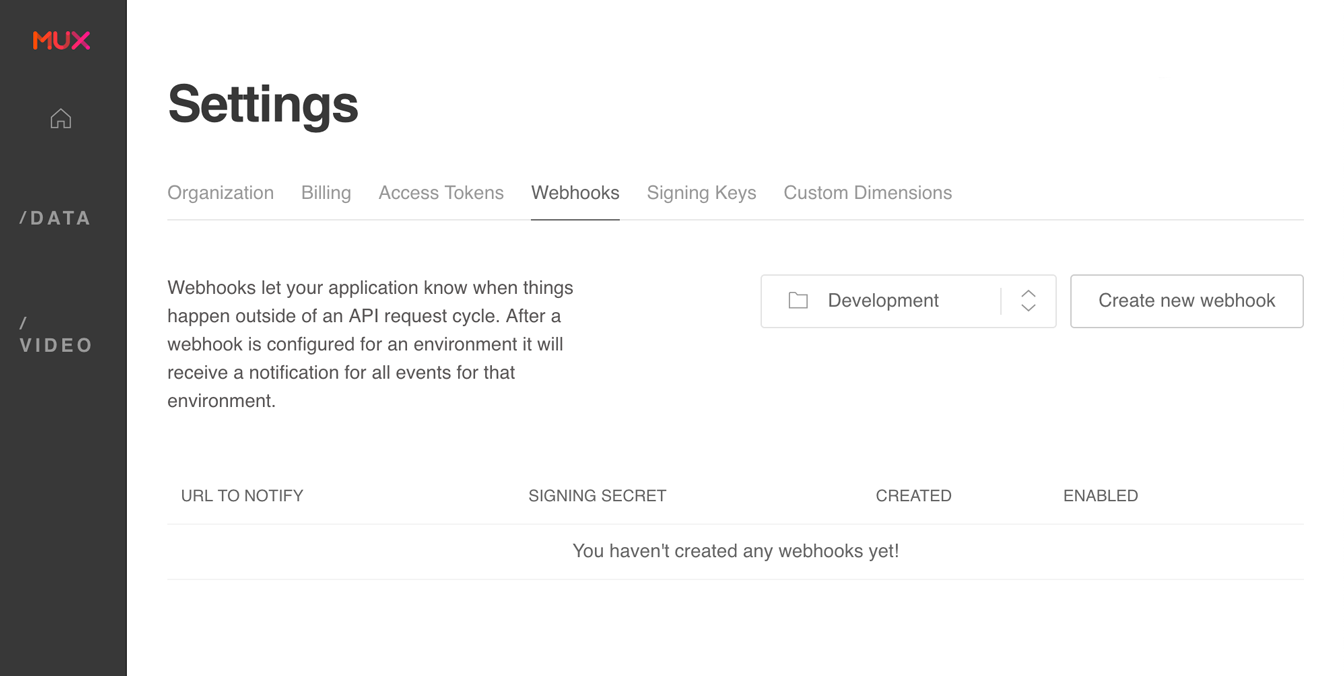
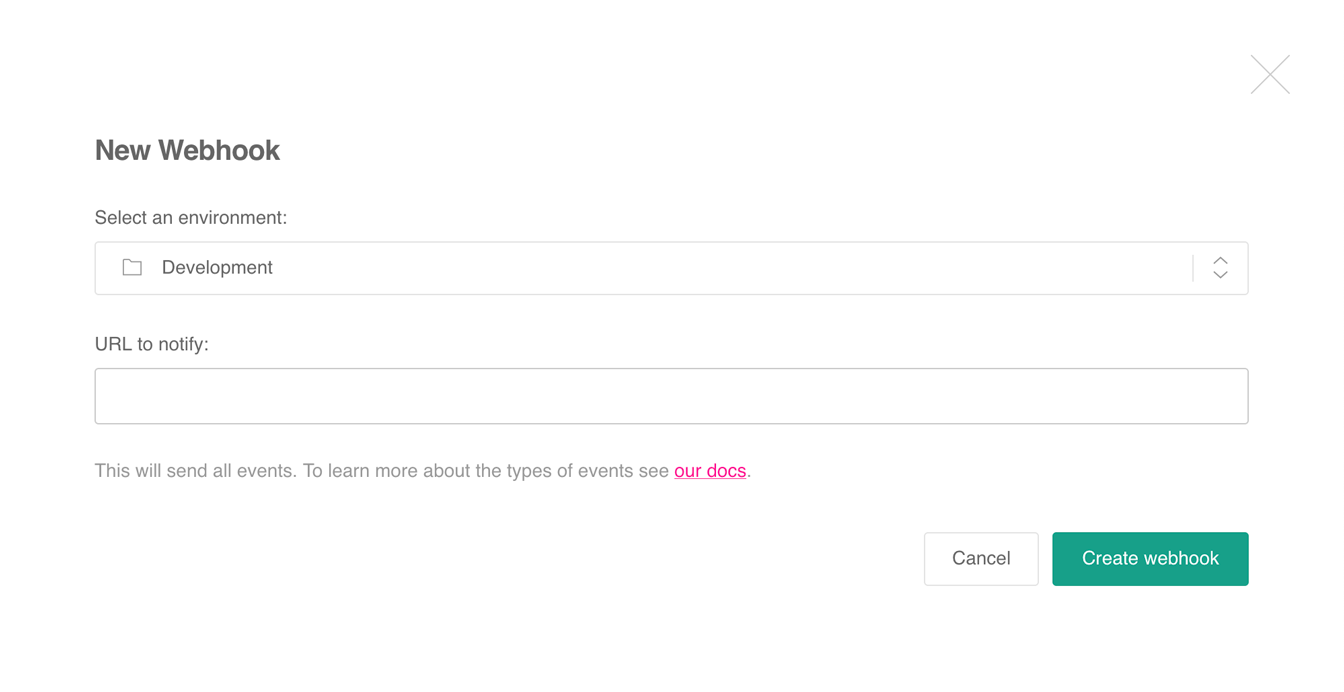
Click the Create new webhook button. In the window that pops up, keep Development environment selected then enter the URL to notify. This will be mux-serverless-webhook-updates.YOUR_SUBDOMAIN/mux-endpoint. To get your subdomain, use wrangler:
wrangler subdomain
Finally, once you return to the webhooks view, click the Show Signing Secret button and make a note of this. We will use it later.
🤖 Telegram Bot Setup
The process for getting Telegram API credentials is quite simple, just follow step by step and you will have API keys in a couple of minutes.
- Bots are created by Telegram’s Bot Father — isn't that cute! Open up a new chat with @BotFather.
- You interact with bots in Telegram by typing commands which begin with a
/in the chat window. Create a new bot using the command/newbot. Bot Father will ask you for a name and then a username. The name can be anything but the username needs to endbotand should only contain alphanumeric characters and underscores. I will use “Astro Landing Page Form Site” as the name andmux_webhook_botas the username. Bot Father will respond with the new API key for your bot make a note of this. - Next we need to create a new group chat and add the bot to it (you can also add anyone whom you want to receive bot messages). From the Telegram menu select New Group. Enter a name for the group when prompted then in the Add Members window type the username of your bot.
Retreive Chat ID
- We’re almost done. Next we need to get the ID for this new group chat so we can send messages to it from the Netlify Serverless Function. From the group chat, send a message to the bot by typing the following command as a message “
/my_id @my_bot” replacemy_botwith the name of your bot. - In the terminal use curl to see the bot’s updates. Remember to replace
123456789:AaBbCcDdEeFfGgHhIiJjKkLlMmNnOoPpQqwith the API key you got earlier:
curl -L https://api.telegram.org/bot123456789:AaBbCcDdEeFfGgHhIiJjKkLlMmNnOoPpQq/getUpdates
If you don’t have curl on your machine, just paste the link into your browser instead. If you are working on a shared machine, be sure to clear the link from the browser history as it contains an API key.
You will get a response back something like this:
{
  "ok": true,
  "result": [
    {
      "update_id": 741497477,
      "message": {
        "message_id": 2,
        "from": {
          "id": 1234567890,
          "is_bot": false,
          "first_name": "Rodney",
          "last_name": "Lab",
          "username": "askRodney"
        },
        "chat": {
          "id": -123456789,
          "title": "Mux Webhook Updates",
          "type": "group",
          "all_members_are_administrators": true
        },
        "date": 1623667295,
        "text": "/my_id @mux_webhook_bot",
        "entities": [
          { "offset": 0, "length": 6, "type": "bot_command" },
          { "offset": 7, "length": 29, "type": "mention" }
        ]
      }
    }
  ]
}
Ok this is just some JSON. It contains two ids, although we just need one. The first is the message ID. We don’t need this one. The second, within the chat object, starts with a “-”, this is the chat ID we need, including the “-”.
We have all the API data we need to proceed. Let's carry on by setting up or function.
☎️ Telegram Client Module
We split the code up, creating a Telegram Client module as well as a Mux webhook Event Module. We will use these two modules when we update the code in the existing src/lib.rs file. Let’s add code for that first module now. Create src/telegram_client.rs and add the following content:
extern crate worker;

use std::collections::HashMap;
use worker::console_log;

pub struct TelegramClient {
    base_url: String,
    bot_api_token: String,
    bot_chat_id: String,
}

impl TelegramClient {
    pub fn new(bot_api_token: &str, bot_chat_id: &str) -> TelegramClient {
        TelegramClient {
            bot_api_token: bot_api_token.into(),
            bot_chat_id: bot_chat_id.into(),
            base_url: "https://api.telegram.org/".to_string(),
        }
    }

    pub async fn send_message(&self, message: &str) -> bool {
        let client = reqwest::Client::new();
        let mut map = HashMap::<&str, &str>::new();
        map.insert("chat_id", self.bot_chat_id.as_str());
        map.insert("text", message);
        let url = format!("{}bot{}/sendMessage", self.base_url, self.bot_api_token);

        match client.post(url).json(&map).send().await {
            Ok(_) => true,
            Err(error) => {
                console_log!("Telegram API response error: {error}");
                false
            }
        }
    }
}
The send_message function will use reqwest to send a REST POST request to the Telegram API with a JSON body containing the body.
📹 Mux Webhook Event Module
We are making good progress. Next up we will create the Mux webhook event module we mentioned earlier. The Worker will be listening for updates from the Mux webhook on a route we will set up in the next section. Once we receive a request on that endpoint, we verify the signature and then parse the JSON body. Let’s add the module code then take a closer look at what it does. Create a src/mux_webhook_event.rs file and add the following code:
use hmac::{Mac, SimpleHmac};
use sha2::Sha256;

use nom::{
    bytes::complete::tag,
    character::complete::{alphanumeric1, char, hex_digit1},
    sequence::separated_pair,
    IResult,
};
use serde::{Deserialize, Serialize};

type HmacSha256 = SimpleHmac<Sha256>;

#[derive(Deserialize, Serialize)]
struct MuxPlaybackId {
    policy: String,
    id: String,
}

#[derive(Deserialize, Serialize)]
struct MuxData {
    status: String,
    playback_ids: Vec<MuxPlaybackId>,
    id: String,
    duration: Option<f32>,
    created_at: u32,
    aspect_ratio: Option<String>,
}

#[derive(Deserialize, Serialize)]
pub struct MuxEvent {
    r#type: String,
    data: MuxData,
    id: String,
    created_at: String,
}

fn hmac_sha_256_verify(key: &[u8], message: &[u8], signature: &[u8]) -> bool {
    let mut mac = HmacSha256::new_from_slice(key).expect("Error parsing HMAC_SHA256 key");
    mac.update(message);
    let result = mac.finalize().into_bytes();
    result.as_slice() == signature
}
The structs in line 14–36 help us convert the JSON body of the Mux webhook request to structures which we can manipulate in our Rust code. The serde package has a Deserialize trait which does a lot of the heavy lifting for us. Some fields are JSON arrays, we can parse these into Rust Vecs with serde. As an example the playack_ids field is an array (see line 23). The webhook sends an initial status update to say an asset has been created, even though it is not yet ready. When we receive this created status update, some fields like video duration will not yet be available. By making these fields Rust Options, will tell serde not to panic if one of them is missing. This way we can use the same structs for created and ready requests. We see this in action in line 25.
We do not use all of the data which the webhook typically sends in our code. If you need additional data for your use case, just update the structs. Here is an example JSON body which you might find useful if you need to map additional data for your own project:
{
  "type": "video.asset.ready",
  "object": {
    "type": "asset",
    "id": "0201p02fGKPE7MrbC269XRD7LpcHhrmbu0002"
  },
  "id": "3a56ac3d-33da-4366-855b-f592d898409d",
  "environment": {
    "name": "Demo pages",
    "id": "j0863n"
  },
  "data": {
    "tracks": [
      {
        "type": "video",
        "max_width": 1280,
        "max_height": 544,
        "max_frame_rate": 23.976,
        "id": "0201p02fGKPE7MrbC269XRD7LpcHhrmbu0002",
        "duration": 153.361542
      },
      {
        "type": "audio",
        "max_channels": 2,
        "max_channel_layout": "stereo",
        "id": "FzB95vBizv02bYNqO5QVzNWRrVo5SnQju",
        "duration": 153.361497
      }
    ],
    "status": "ready",
    "max_stored_resolution": "SD",
    "max_stored_frame_rate": 23.976,
    "id": "0201p02fGKPE7MrbC269XRD7LpcHhrmbu0002",
    "duration": 153.361542,
    "created_at": "2018-02-15T01:04:45.000Z",
    "aspect_ratio": "40:17"
  },
  "created_at": "2018-02-15T01:04:45.000Z",
  "accessor_source": null,
  "accessor": null,
  "request_id": null,
}
HMAC Verification
We will use the hmac_sha_256_verify function in lines 38–43 to verify the Webhook update. HMAC (Hash-based Message Authentication Code) is a cryptographic algorithm for verifying messages. When Mux creates the JSON body, the server generates a digest of the body, using the signing secret for our webhook. It then includes this digest in the header it sends to our endpoint. When we receive the body, we can also use the signing secret to generate a digest of the body. If our own calculated digest matches the one placed in the header by the Mux server, we have some assurance the message is genuine and has not been tampered with. This is because if an adversary tampered with the body while it was in transit, the digest would not match the signature in the header. Also, to send a spoofed message, the adversary would need to know the signing key.
So in a nutshell hmac_sha_256_verify is just performing this data integrity and authenticity verification function.
MuxWebhookEvent struct
Paste in this missing code at the bottom of src/mux_webhook_event.rs:
pub struct MuxWebhookEvent {
    signing_secret: String,
}

impl MuxWebhookEvent {
    pub fn new(signing_secret: &str) -> MuxWebhookEvent {
        MuxWebhookEvent {
            signing_secret: signing_secret.into(),
        }
    }

    pub fn parse_mux_signature_header(mux_signature: &str) -> IResult<&str, (&str, &str)> {
        let mut parser = separated_pair(
            nom::sequence::preceded(tag("t="), alphanumeric1),
            char(','),
            nom::sequence::preceded(tag("v1="), hex_digit1),
        );
        parser(mux_signature)
    }

    pub fn verify_event(&self, mux_signature: &str, raw_request_body: &str) -> bool {
        let (timestamp, signature) =
            match MuxWebhookEvent::parse_mux_signature_header(mux_signature) {
                Ok((_, (val_timestamp, val_signature))) => (val_timestamp, val_signature),
                Err(_) => return false,
            };
        let payload = format!("{}.{}", timestamp, raw_request_body);
        hmac_sha_256_verify(
            self.signing_secret.as_bytes(),
            payload.as_bytes(),
            &hex::decode(signature).unwrap(),
        )
    }
}
In line 72 you can see we call hmac_sha_256_verify to verify our Mux event. When our endpoint receives a webhook event REST request, it will strip the signature header then call verify_event using that signature and the raw JSON message body. The signature header will look something like:
t=1565220904,v1=20c75c1180c701ee8a796e81507cfd5c932fc17cf63a4a55566fd38da3a2d3
The first part is a timestamp, while the v1 part is the digest. We use nom to parse this, separating out the timestamp and digest. Then, we need to combine the timestamp with with JSON raw body and use that combined string for our digest calculation. We form the string in line 71, joining the two components with a full stop (period). For more on Mux webhook verification, see Mux Verify webhook signatures docs.
🤫 Mux Serverless Webhook Update: Secrets
Cloudflare Workers have a mechanism for storing secrets, which saves us accidentally committing them in our repos. The secrets are uploaded to the Cloudflare dashboard from the Terminal. Once there, they are accessible in dev mode as well in the published worker.
Let’s add the two Telegram bot secrets now. First you will need to link you project to you Cloudflare account if you have not yet done that:
wrangler login
This will print a link to the console which you can paste into your browser. It takes you to the Cloudflare dashboard. Check permission and accept if you comfortable to do so.
Now we can upload the secrets we generated for our Telegram bot earlier:
wrangler secret put TELEGRAM_BOT_API_TOKEN
When wrangler prompts you, paste the token into the terminal. Then repeat for the bot chat id:
wrangler secret put TELEGRAM_BOT_CHAT_ID
Then, the MUX_WEBHOOK_SIGNING_SECRET:
wrangler secret put MUX_WEBHOOK_SIGNING_SECRET
Next we will wire everything up!
🔌 Connecting it all Up
The final thing to do before testing is to connect everything. I have removed the boilerplate routes we don’t use here. Feel free to keep them for reference and debugging. First let’s add the modules we need to set everything up:
use crate::mux_webhook_event::{MuxEvent, MuxWebhookEvent};
use telegram_client::TelegramClient;

use serde::Serialize;
use serde_json::json;
use worker::*;

mod mux_webhook_event;
mod telegram_client;
mod utils;

fn log_request(req: &Request) {
    console_log!(
        "{} - [{}], located at: {:?}, within: {}",
        Date::now().to_string(),
        req.path(),
        req.cf().coordinates().unwrap_or_default(),
        req.cf().region().unwrap_or_else(|| "unknown region".into())
    );
}

#[derive(Serialize)]
struct MuxEventReport {
    data: MuxEvent,
    verified: bool,
}
Much like we used serde to parse JSON into Rust structs in the Mux module, we will use it to convert our parsed data into a JSON report which we will use serde to create a JSON report with our status update. Still using serde, we will serialise the report into a pretty-formatted string which we will send to the Telegram chat. The code in lines 22-26 helps define the structure of the report. serde will use this to generate our output.
Now replace the existing endpoints (in the same file) with this code:
   let router = Router::new();

    // Add as many routes as your Worker needs! Each route will get a `Request` for handling HTTP
    // functionality and a `RouteContext` which you can use to  and get route parameters and
    // Environment bindings like KV Stores, Durable Objects, Secrets, and Variables.
    router
        .post_async("/mux-endpoint", |mut req, ctx| async move {
            let mux_secret = ctx.var("MUX_WEBHOOK_SIGNING_SECRET")?.to_string();
            let mux_webhook_event = MuxWebhookEvent::new(&mux_secret);
            let mux_signature = match req.headers().get("Mux-Signature").unwrap() {
                Some(value) => value,
                None => return Response::error("Bad request", 400),
            };
            let raw_request_body = match req.text().await {
                Ok(res) => res,
                Err(_) => return Response::error("Bad request", 400),
            };
            let data: MuxEvent = match serde_json::from_str(&raw_request_body) {
                Ok(res) => res,
                Err(_) => return Response::error("Bad request", 400),
            };
            let verified: bool = mux_webhook_event.verify_event(&mux_signature, &raw_request_body);
            let report: MuxEventReport = MuxEventReport { data, verified };
            let telegram_message = serde_json::to_string_pretty(&report).unwrap();
            let telegram_bot_api_token = ctx.var("TELEGRAM_BOT_API_TOKEN")?.to_string();
            let telegram_bot_chat_id = ctx.var("TELEGRAM_BOT_CHAT_ID")?.to_string();
            let telegram_client =
                TelegramClient::new(&telegram_bot_api_token, &telegram_bot_chat_id);
            telegram_client.send_message(&telegram_message).await;
            Response::ok("Received loud and clear!")
        })
        .run(req, env)
        .await
}
In line 44 you can see we are listening for a POST request on https://mux-serverless-webhook-updates.example.workers.dev/mux-endpoint. Following on, in line 45 you see how we can pull a secret from the Cloudflare Worker environment. Lines 47–50 is where we parse the headers looking for the Mux-Signature header needed for verification.
In line 55 we parse the incoming Mux webhook event body from JSON into the data variable. In line 60 & 61 we convert this to our report struct and then use serde to pretty format that into stringified JSON for us. Finally in line 67, it is important to send the 200 OK response back to Mux. If the Mux server does not receive this reply, it will keep trying to send the webhook update — this could fill up your chat window quite quickly 😅 Let me know if anything there needs a little more explanation. Next up we will run a test.
💯 Mux Serverless Webhook Updates: Testing it Out
For a full production app you would want to run some unit tests using a package like httptest to mock server responses. Here we will just send a POST request, using curl, to the dev server and check we get a message in our Telegram chat. Paste this curl command into your Terminal:
curl --header "Content-Type: application/json" --header "Mux-Signature: t=1565125718,v1=854ece4c22acef7c66b57d4e504153bc512595e8e9c772ece2a68150548c19a7" --request POST \
  --data '{"type":"video.asset.static_renditions.ready","request_id":null,"object":{"type":"asset","id":"6DK2ysIoRrRK21bR11iwbZbfAr4Dcc6d00P2wBJsRcSM"},"id":"eb5fd989-acd0-456f-9acf-87b79435e320","environment":{"name":"Production","id":"nf29e9"},"data":{"tracks":[{"type":"video","max_width":1848,"max_height":1040,"max_frame_rate":29.87,"id":"QEz02bRdtW1m2yWyXq02SeLS4lUe5oVRLNhdsDWpxfMGQ","duration":7.331733},{"type":"audio","max_channels":2,"max_channel_layout":"stereo","id":"mJV2z6wvS7vSHSp4ijt01V3ApsXUGsL4pFqpO9HJ9364","duration":7.337333},{"type":"text","text_type":"subtitles","text_source":"uploaded","status":"ready","name":"English","language_code":"en-GB","id":"1VOe7U2XGEsYrQF2z76IP74KEZE6cBwdRrcOM00VLrasJR915VkYAQg","closed_captions":true}],"status":"ready","static_renditions":{"status":"ready","files":[{"width":640,"name":"low.mp4","height":360,"filesize":218013,"ext":"mp4","bitrate":235752},{"width":960,"name":"medium.mp4","height":540,"filesize":280599,"ext":"mp4","bitrate":303432},{"width":1848,"name":"high.mp4","height":1040,"filesize":456232,"ext":"mp4","bitrate":493352}]},"playback_ids":[{"policy":"public","id":"buwMQjHrW24zlt3COatm35kUeNfQOULYwhGQGY12wv8"}],"mp4_support":"standard","max_stored_resolution":"HD","max_stored_frame_rate":29.87,"master_access":"none","id":"6DK2ysIoRrRK21bR11iwbZbfAr4Dcc6d00P2wBJsRcSM","duration":7.399744,"created_at":1649776630,"aspect_ratio":"231:130"},"created_at":"2022-04-12T15:17:26.000000Z","attempts":[],"accessor_source":null,"accessor":null}' \
        http://127.0.0.1:8787/mux-endpoint
![Mux Serverless Webhook Updates: Telegram message screensht. J S O N Messagae reads: "{ "data": { "type": "video.asset.static_renditions.ready", "data": { "status": "ready", "playback_ids": [ { "policy": "public", "id": "buwMQjHrW24zlt3COatm35kUeNfQOULYwhGQGY12wv8" } ], "id": "6DK2ysIoRrRK21bR11iwbZbfAr4Dcc6d00P2wBJsRcSM", "duration": 7.399744, "created_at": 1649776630, "aspect_ratio": "231:130" }, "id": "eb5fd989-acd0-456f-9acf-87b79435e320", "created_at": "2022-04-12T15:17:26.000000Z" }, "verified": false }"](https://dev-to-uploads.s3.amazonaws.com/uploads/articles/wxq8w98bfn17qf045jh6.png)
You will get a message pop up in your Telegram window if all is well. verified will be returned as false since the Mux-Signature in this test request was not created using your own signing secret. We will test verification in the next step though. The final step is to deploy the worker. You can do this using wrangler:
wrangler publish
As a final test, try uploading a short video to Mux to see if you get the updates in your Telegram chat. If you do not, get anything you can use the Mux dashboard API Activity view to help troubleshoot. Just click API Activity from the menu at the bottom left:

In the main window you will see logs which will confirm that Mux actually sent the webhook update out.

🙌🏽 Mux Serverless Webhook Updates: Wrapping Up
In this post we have seen how you can use Rust Cloudflare workers to improve your Mux workflow. In more detail, we have seen:
- a way to use Serde to process incoming JSON requests,
- how to verify authenticity and data integrity of webhook events using HMAC,
- how you can use a Telegram bot from your Rust Cloudflare Worker using Reqwest.
The Mux serverless webhook updates demo code is in the Rodney Lab GitHub repo.
I hope you found this article useful and am keen to hear where you will go next as well as potential improvements, both to the Rust code and explanations above.
🙏🏽 Mux Serverless Webhook Updates: Feedback
Have you found the post useful? Would you prefer to see posts on another topic instead? Get in touch with ideas for new posts. Also if you like my writing style, get in touch if I can write some posts for your company site on a consultancy basis. Read on to find ways to get in touch, further below. If you want to support posts similar to this one and can spare a few dollars, euros or pounds, please consider supporting me through Buy me a Coffee.
Finally, feel free to share the post on your social media accounts for all your followers who will find it useful. As well as leaving a comment below, you can get in touch via @askRodney on Twitter and also askRodney on Telegram. Also, see further ways to get in touch with Rodney Lab. I post regularly on Astro as well as SvelteKit. Also subscribe to the newsletter to keep up-to-date with our latest projects.


